ArdquariumPi
Hardware
Shown below is an Arduino system that I have built for my aquarium.
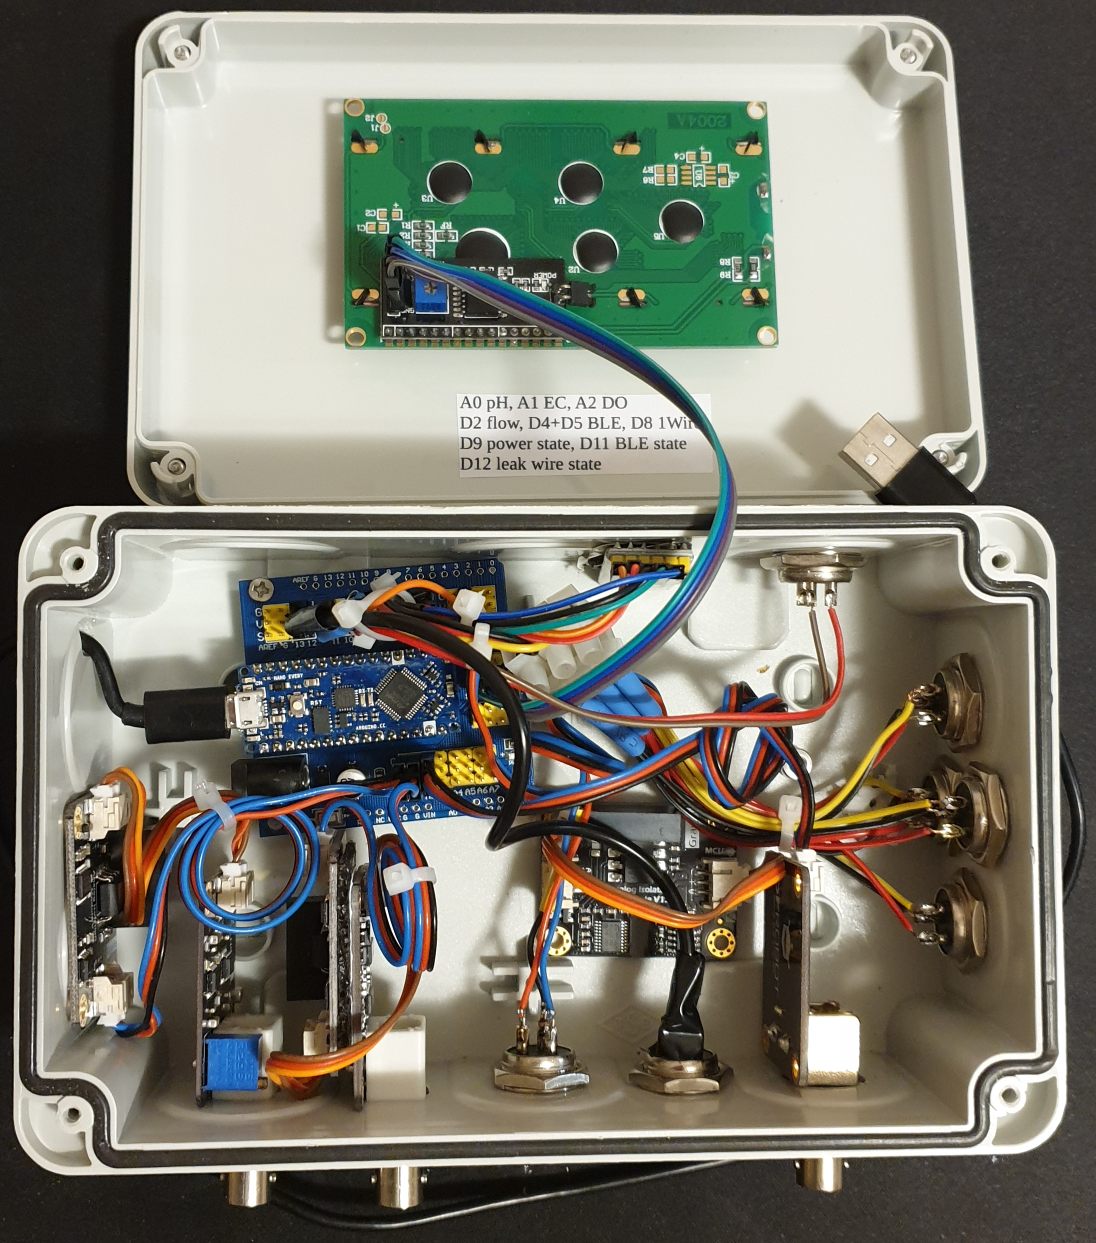
Here I utilize
- Arduino Nano Every,
- Nano I/O Expansion Sensor Shield,
- 4 parallel connectors for 1-Wire thermistors DS18B20,
- sensor boards measuring pH, EC (electrical conductivity) and DO (dissolved oxygen) with analog insulation boards,
- a connector to a pulse generating flow-meter device,
- a connector to monitor the external power supply state (before the UPS board of Raspberry Pi),
- a connector to a leak sensor wire,
- BLE module HM10,
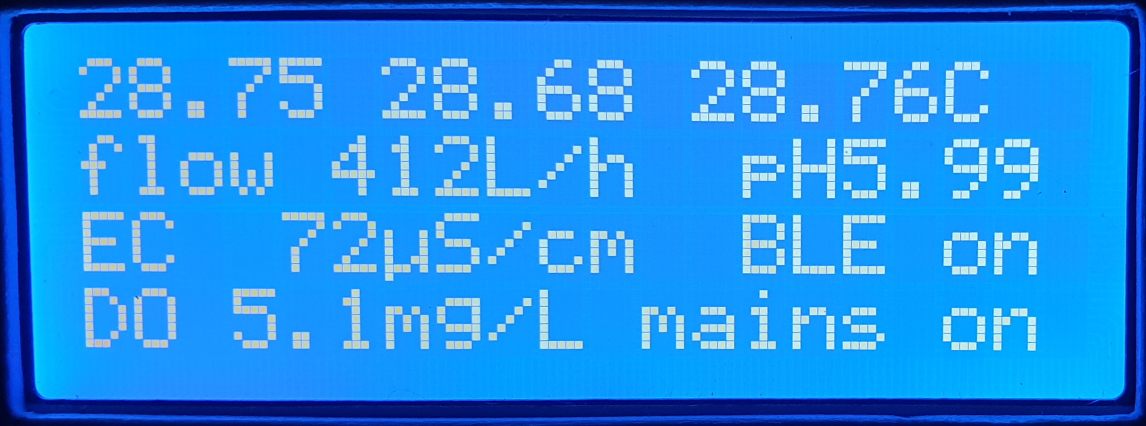
- a 20×4 LCD display (a 16×2 display is also possible and was used earlier).
When I was building the system, I connected the devices one by one and tested them with the supplied test scripts, find them in “arduino” folder. The Arduino IDE can be run on both a Windows computer and a Raspberry Pi computer.
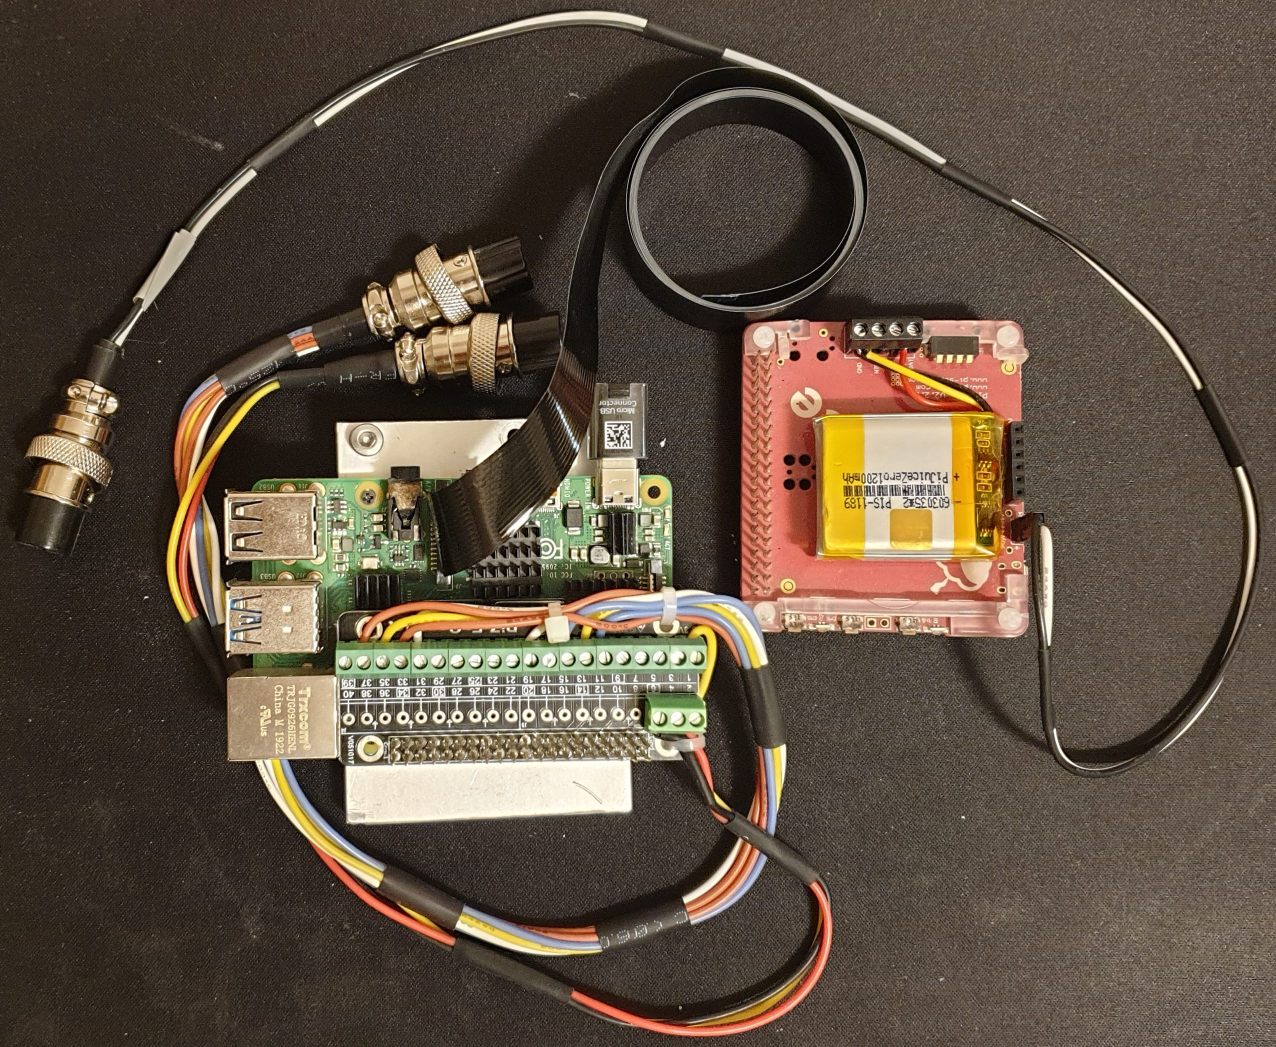
I use Raspberry Pi 4B as passively cooled, with a UPS hat (PiJuice) and a GPIO connector hat, see below with the PiJuice hat disconnected.
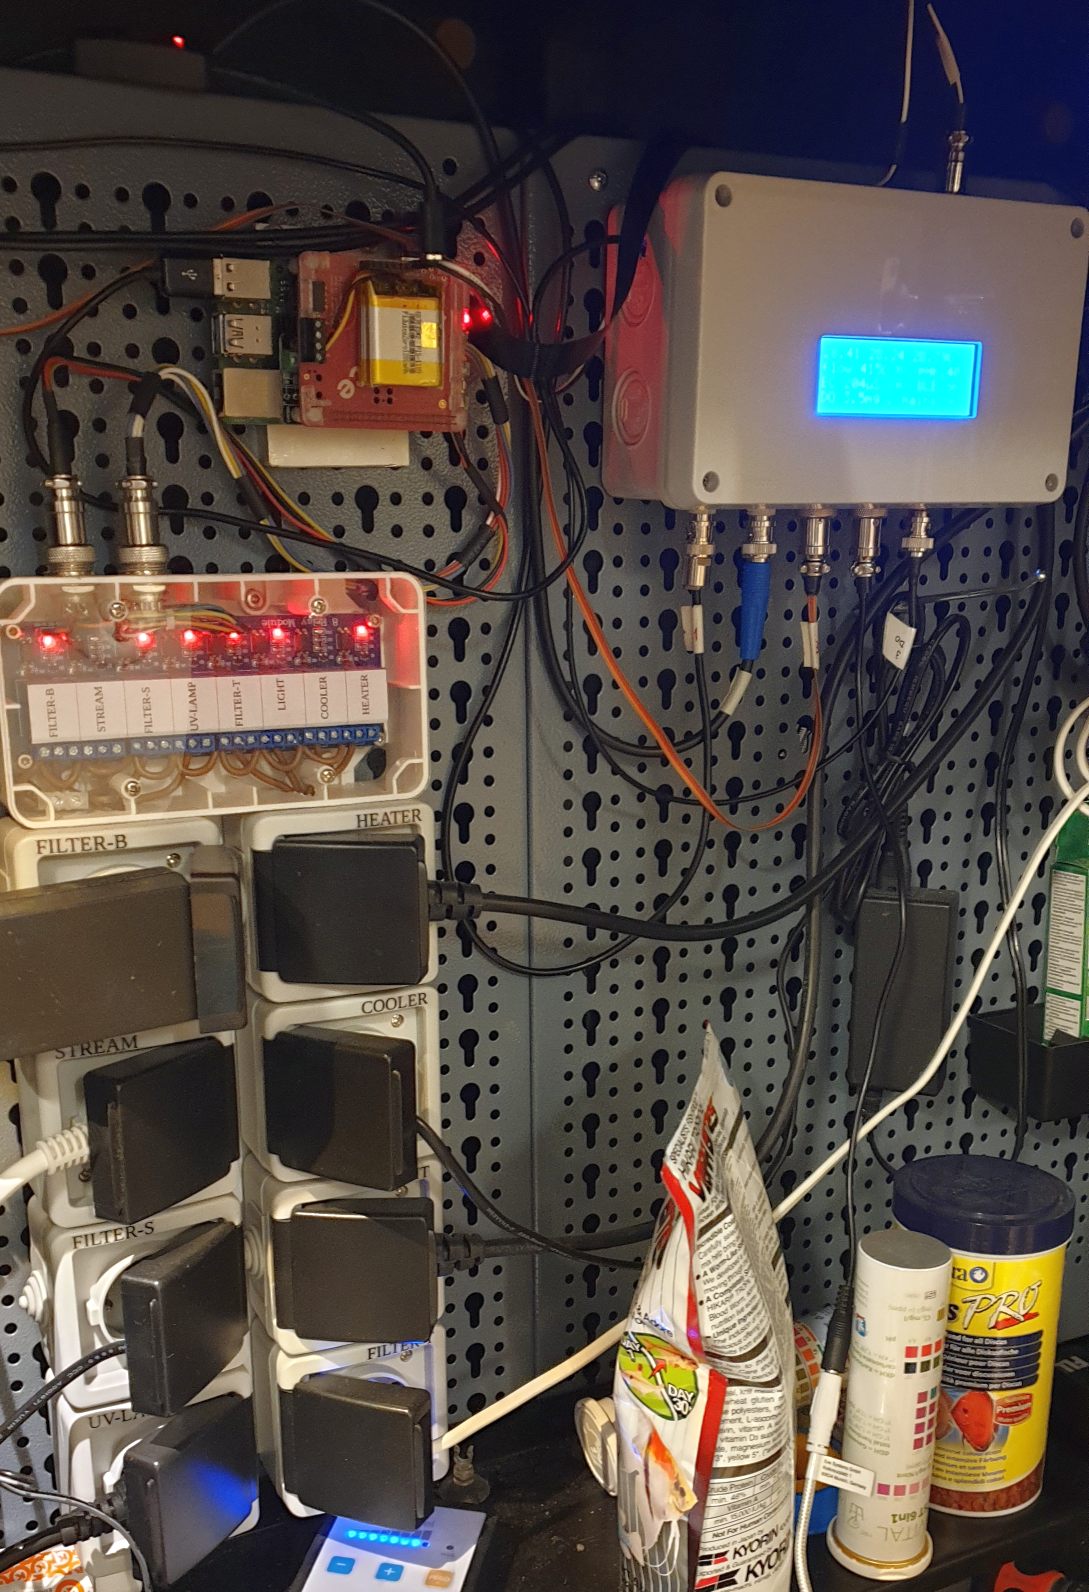
The GPIO pins are wired to an 8-Relais Module that controls 8 power sockets. The relais and the sockets form a single unit with all the high voltage wires encapsulated in it.
I have an old phone located close to the aquarium and connected via BLE. It has a cheap pre-paid SIM card that enables alarm texts. Quite a problem is that the phone may drop the BLE connection when the screen goes to energy saving mode. On this particular phone the problem was solved by disabling the energy saving mode.
Software
ArdquariumPi was tested on Raspberry Pi OS Bullseye (Debian 11) and earlier on Raspberry Pi OS Buster (Debian 10). It should run on other desktops as well, e.g. Ubuntu Desktop, except the camera functionality may have to be adjusted there.
I recommend running Raspberry Pi OS in the desktop mode, not the CLI mode, as one can utilize several useful desktop facilities there, such as pijuice GUI, Arduino IDE, text editors and file managers. For this, enable boot to Desktop, and edit “boot/config.txt”: set “hdmi_force_hotplug=1” for running Raspberry Pi without a screen. Enable the VNC service, and run your Raspberry Pi desktop remotely. Use a remote file manager (I use Filezilla or Secure FTP of Total Commander) to copy files to/from Raspberry Pi.
Dependencies
sudo pip3 install croniter
sudo pip3 install distro
# to use with a camera:
sudo pip3 install opencv-python
sudo apt-get install libatlas-base-dev
sudo pip3 install -U numpy
How to run
No “setup.py” is provided because the user will need write-access to a few files.
For a test of the web GUI on any computer, unzip into a suitable location “cd”
to that folder and run python3 ardquariumPi.py right out of box, maybe with
sudo. Access the web interface as “localhost” in your browser.
For a real run on a Raspberri Pi, unzip into a user-accessible folder, e.g.
“ArdquariumPi” in the “pi” home, and edit “supply.py” (this is where you
describe your connected devices) and “__secret.py” (if you want emails,
external access and external web hooks). Edit and upload
“arduino/ardquarium/ardquarium.ino” into your Arduino board if needed; this is
probably the heaviest task. Read files in “autorun” folder and use them. Run
sudo python3 ardquariumPi.py. Access the web interface by the LAN address of
the Raspberry Pi.
If you want to access the web GUI remotely or you want to integrate a voice assistant, edit “ardquariumPi.py”. Set “allowRemote = True” and add “trustedProxies” if needed. Specify a fixed address for your Raspberry Pi and enable port forwarding in your router for http (port 80).
Remote connection security
A POST request from an ifttt server will be processed if its json data has a “key” entry matching the key in “__secret.py”.
Remote connection to the web GUI is granted to all LAN devices, this can be changed by “trustedAddresses” in “ardquariumPi.py”. An unknown remote device will be redirected to a login page; the credentials must match those specified in “__secret.py”. After “userAttemptsMax” attempts the remote address is blocked forever (for the duration of the python session). A trusted address remains trusted forever (for the duration of the python session). Remote connections are reported in the GUI list of messages, printed out in the terminal and saved in the application log file.
Integration with a voice assistant
Here is my example, there are several similar options available on the market.
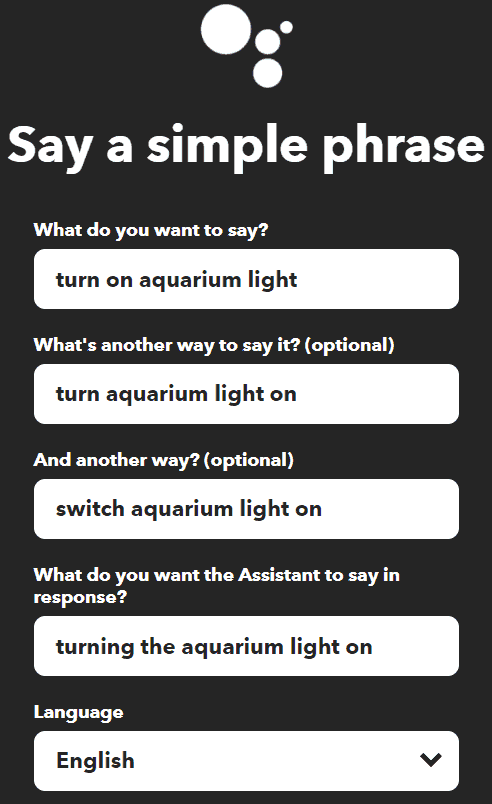
Create an account at ifttt.com. Create an applet. In “if this” part add Google Assistant, with “a simple phrase” option:
In “then that” add a webhook with:
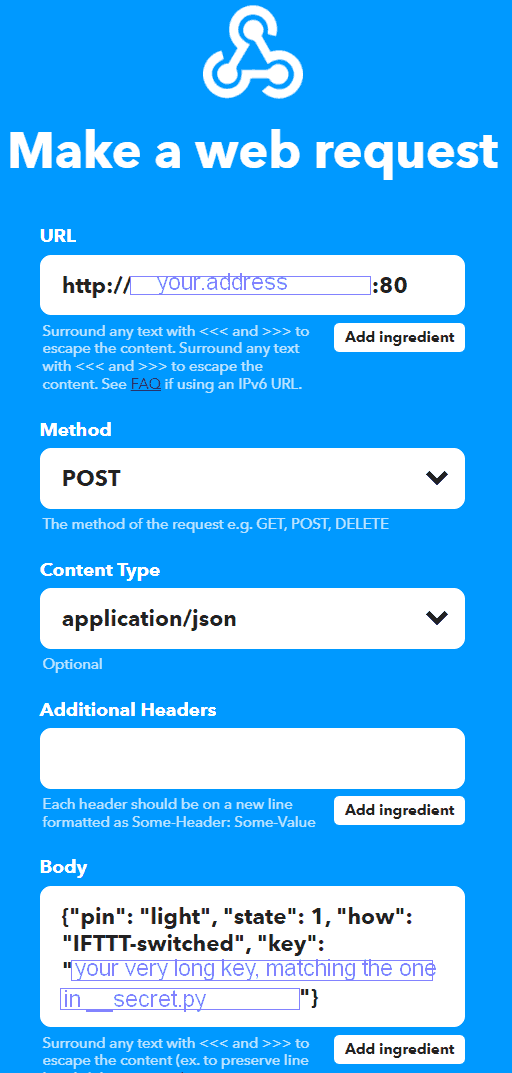
Use any pin name in the json data, as defined in “supply.py”.
You may want to setup a dynamic DNS service for your router to be visible from the outside world by a symbolic name.
Camera
Presently (20 Jan 2022) there is no python support for Raspberry Pi cameras in Raspberry Pi OS Bullseye. Here, the implemented solution is to start a TCP stream by “libcamera-vid” (“raspivid” in earlier Raspberry Pi OS versions) that will be accepted by OpenCV. A disadvantage of this solution is quite a noticeable delay of the video playback.
Please examine the header of “camera.py/Streamer” class for the offered video processing routines, and modify it according to you needs. If no camera is wanted, set “enabled = False” in “camera.py”.
CSS colors
The default dark color theme can be changed in the two css files in “static/css”, where one can comment/uncomment a block of color definitions at the top of the files.
Phone app in MIT App Inventor
A block diagram of the app can be seen as a png file. Tested only in Android but can be built also in iOS. Import the source to “MIT app inventor”, build it, load to your phone and start it. Press ‘Scan’. When it finds ‘MNSoft-xx’, press ‘Stop Scan’, select the device and press ‘Connect’. Give your phone number to send alarm texts to.